Surfing is a sport that has been enjoyed for centuries, with its origins dating back to ancient Polynesia. It involves riding waves on a surfboard, which is an essential tool for any surfer. Over the years, surfboard building has evolved from using traditional materials like wood to more modern materials such as foam and fiberglass. Today, follow Top Surfboards to learn how to build surfboards and catch the wave!
Building your own surfboard can be an incredibly rewarding experience. Not only do you get to create something with your own hands, but you also have the opportunity to customize it according to your preferences and surfing style. As a professional author who has dabbled in board building myself, I can attest to the sense of pride and accomplishment that comes from riding waves on a board that I crafted myself.
Key Takeaways
- Building your own surfboard can be a rewarding and fulfilling experience.
- Choosing the right materials and understanding the different types of surfboards is crucial for a successful build.
- Shaping and sanding your board requires patience and attention to detail.
- Applying the finishing touches, such as adding fins and a leash, is important for safety and performance.
- Learning to catch the perfect wave takes practice and dedication, but the joy of riding your own board makes it all worth it.
The Benefits of Building Your Own Surfboard
One of the main benefits of building your own surfboard is the ability to customize it exactly how you want it. When purchasing a pre-made board, you are limited by what is available in stores or online. However, when building your own board, you have complete control over every aspect – from the shape and size of the board to the type of fins and graphics used.
Another advantage is cost savings. While there may be some initial investment in tools and materials, building your own surfboard can save you money in the long run compared to buying a brand new one from a store or shaper. Additionally, if you happen to damage your board while surfing (which is bound to happen at some point), repairing it yourself will be much cheaper than taking it into a shop.
Lastly, there’s nothing quite like the sense of accomplishment that comes from riding waves on something you built with your own two hands. It’s not just about catching waves; it’s about knowing that every turn and maneuver was made possible because of your craftsmanship.
Choosing the Right Materials for Your Board
When it comes to building your own surfboard, choosing the right materials is crucial. The two main components of a surfboard are foam and fiberglass.
Foam comes in various types, with the most common being polyurethane (PU) and expanded polystyrene (EPS). PU foam is denser and more traditional, while EPS foam is lighter and more buoyant. Each has its pros and cons, so it’s important to consider factors such as weight, durability, and performance when making your decision.
Fiberglass is used to reinforce the foam core of the board. It provides strength and rigidity while allowing for flex during maneuvers. There are different weights of fiberglass available, ranging from light to heavy. The weight you choose will depend on your surfing style and preferences.
You can purchase these materials from specialized surfboard supply stores or online retailers that cater to DIY board builders. It’s important to do some research beforehand to ensure you’re getting high-quality materials that will result in a durable board.
Understanding the Different Types of Surfboards
| Type of Surfboard | Description | Advantages | Disadvantages |
|---|---|---|---|
| Shortboard | A high-performance board designed for advanced surfers to ride in critical waves. | Fast, maneuverable, and responsive in steep waves. | Difficult to paddle, not suitable for beginners, and can be unstable in small waves. |
| Longboard | A classic board with a rounded nose and a long, wide body that is easy to paddle and ride. | Stable, easy to catch waves, and suitable for beginners and small waves. | Not as maneuverable as shortboards and can be heavy and difficult to transport. |
| Fish | A board with a wide, round nose and a swallowtail that is designed for speed and maneuverability in small to medium waves. | Fast, easy to paddle, and suitable for a wide range of surfers and wave conditions. | Not as stable as longboards and can be difficult to control in larger waves. |
| Funboard | A hybrid board that combines the stability of a longboard with the maneuverability of a shortboard. | Easy to paddle, suitable for a wide range of surfers and wave conditions, and versatile in terms of riding style. | Not as fast or maneuverable as shortboards and not as stable as longboards. |
| Gun | A long, narrow board designed for big wave surfing and high-speed maneuvers. | Fast, maneuverable, and suitable for experienced surfers in large, powerful waves. | Difficult to paddle and control in small waves, and not suitable for beginners. |
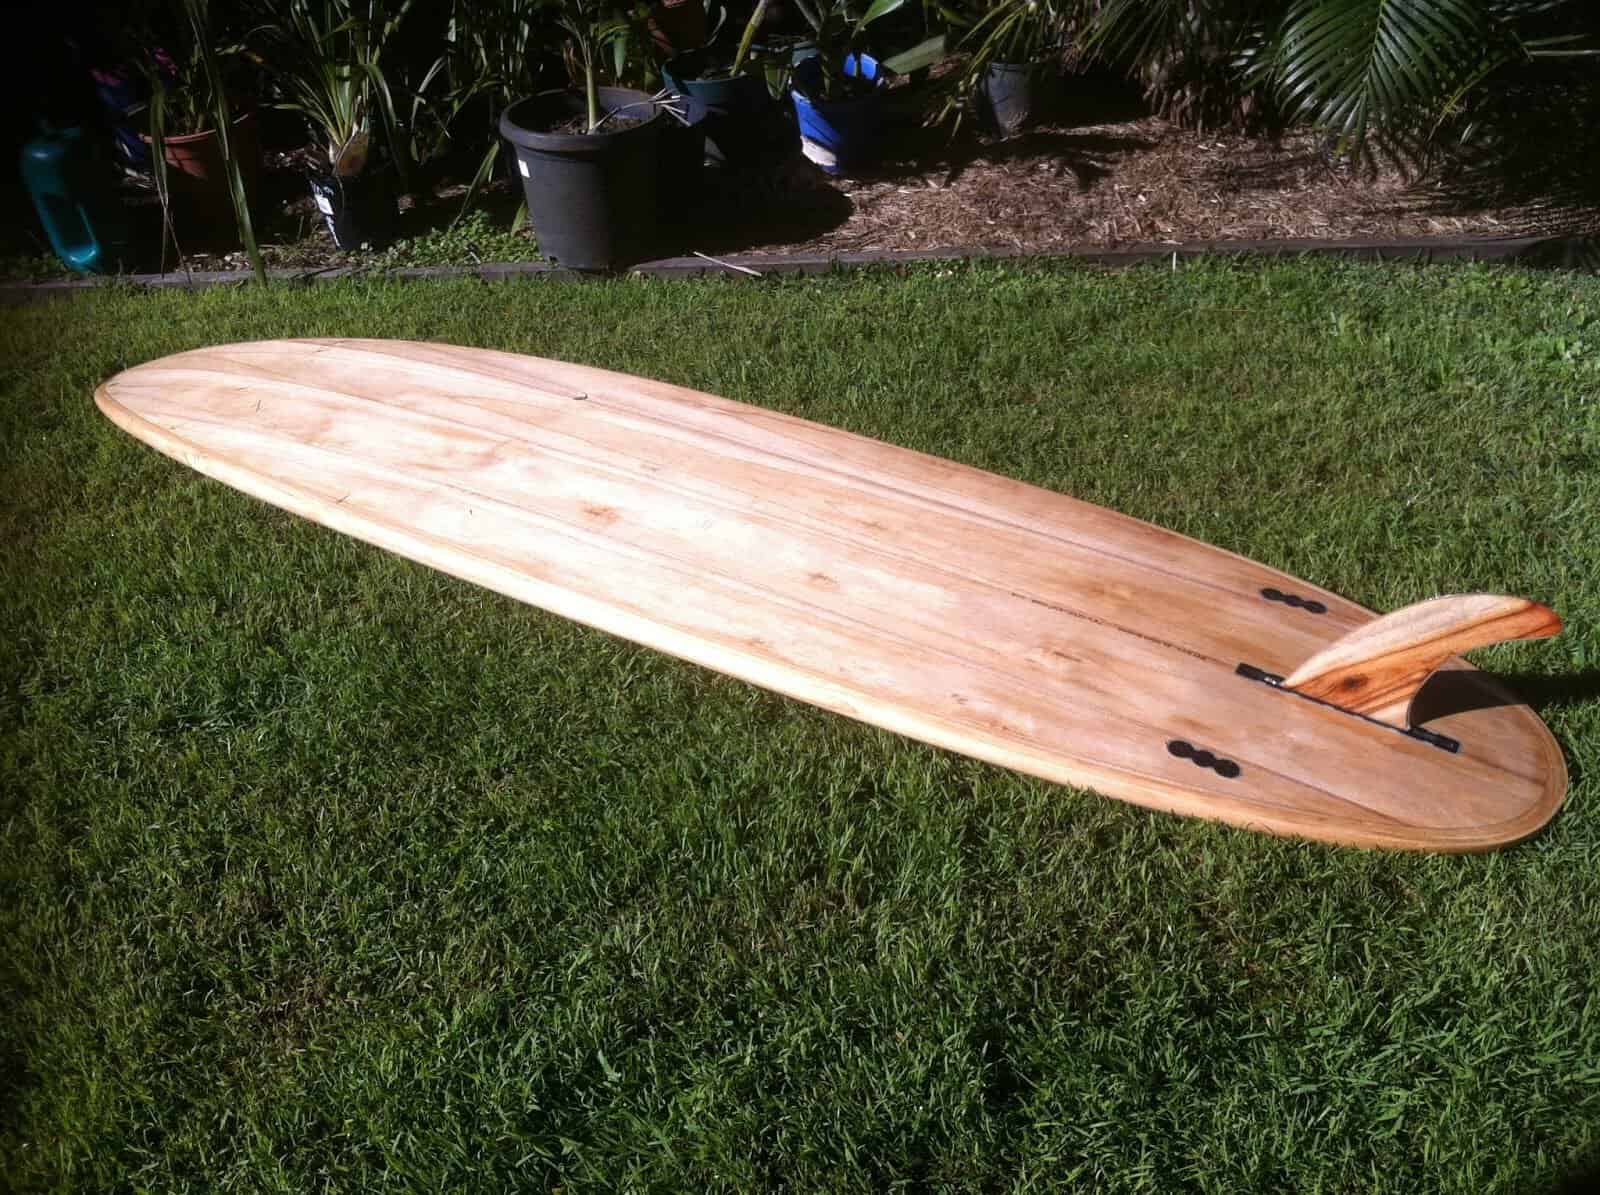
Surfboards come in various shapes and sizes, each designed for different skill levels and surfing styles. The three main types are shortboards, longboards, and funboards.
Shortboards are typically less than 7 feet long with a pointed nose and narrow tail. They are designed for advanced surfers who want maximum maneuverability on steep waves. Shortboards require precise footwork and quick reactions due to their smaller size.
Longboards are longer than 9 feet with a rounded nose and wide tail. They offer stability on small waves but can also handle larger swells due to their increased volume. Longboarding is often associated with a more relaxed style of surfing that emphasizes smooth turns rather than radical maneuvers.
Funboards fall somewhere in between shortboards and longboards in terms of length (around 7-8 feet). They combine elements from both types – offering stability and ease of paddling like a longboard, while still allowing for maneuverability like a shortboard. Funboards are great for beginners or intermediate surfers looking to progress their skills.
Choosing the right type of board depends on your skill level, surfing goals, and the conditions you’ll be riding in. It’s always a good idea to consult with experienced surfers or shapers who can provide guidance based on your specific needs.
Step-by-Step Guide to Building Your Own Surfboard
Building your own surfboard may seem daunting at first, but with the right guidance and patience, it can be an enjoyable process. Here is a step-by-step guide to get you started:
1. Preparing the materials: Gather all the necessary tools and materials such as foam blanks, fiberglass cloth, resin, fins, leash plug, sandpaper, and shaping tools.
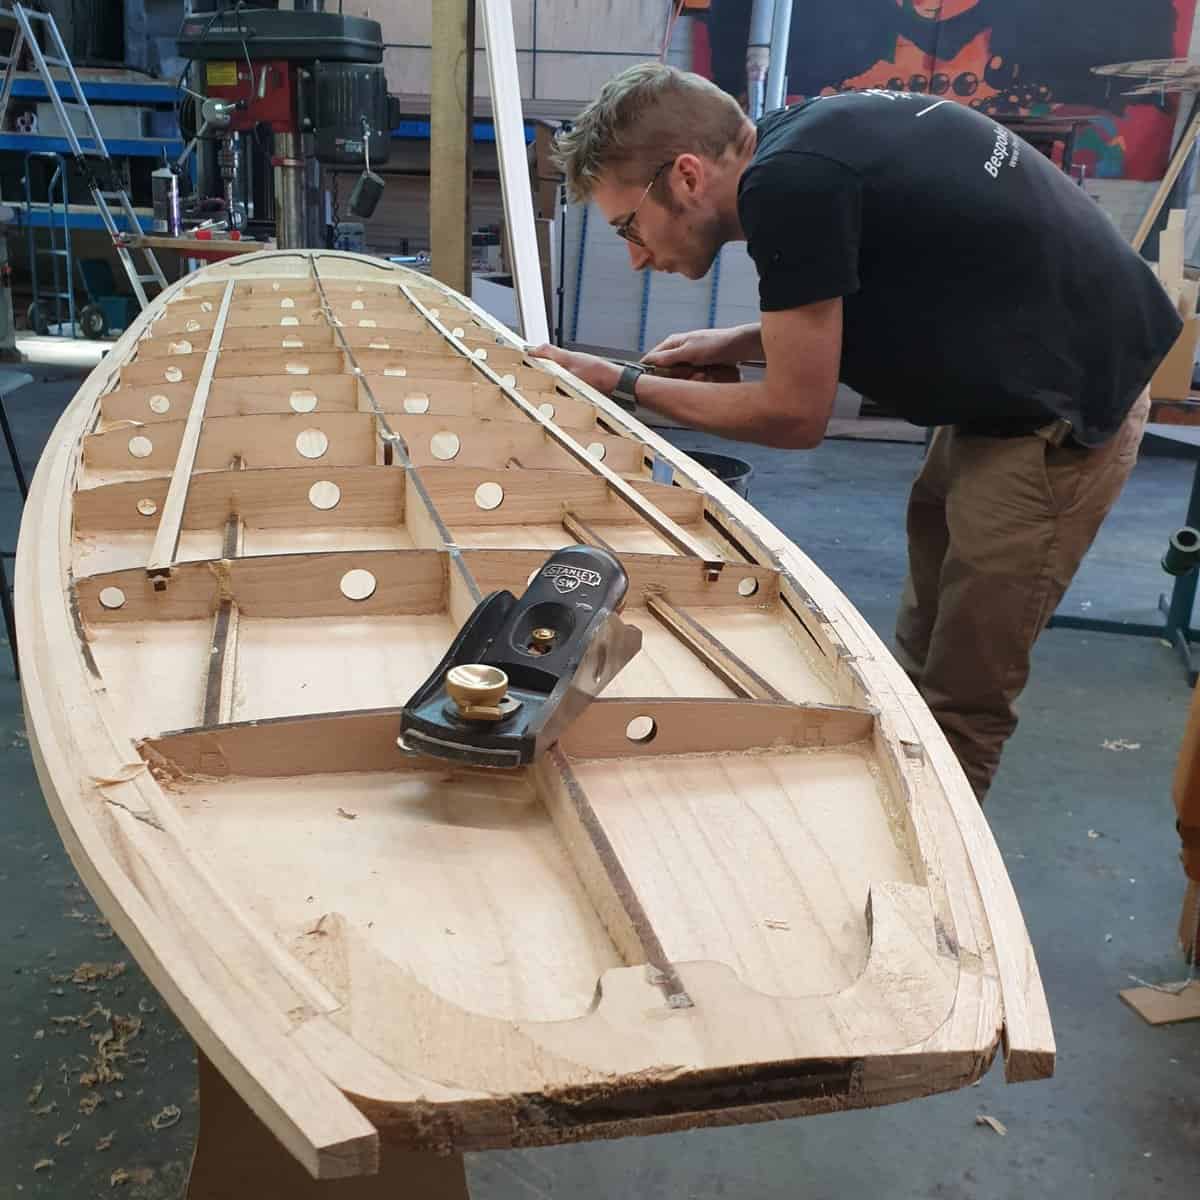
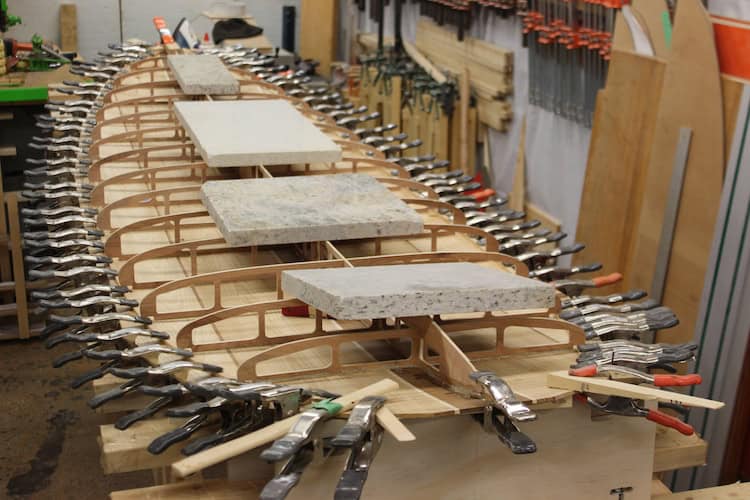
2. Shaping the foam: Use shaping tools such as planers and sanding blocks to shape the foam blank into your desired outline. This is where you can get creative with curves and contours that suit your surfing style.
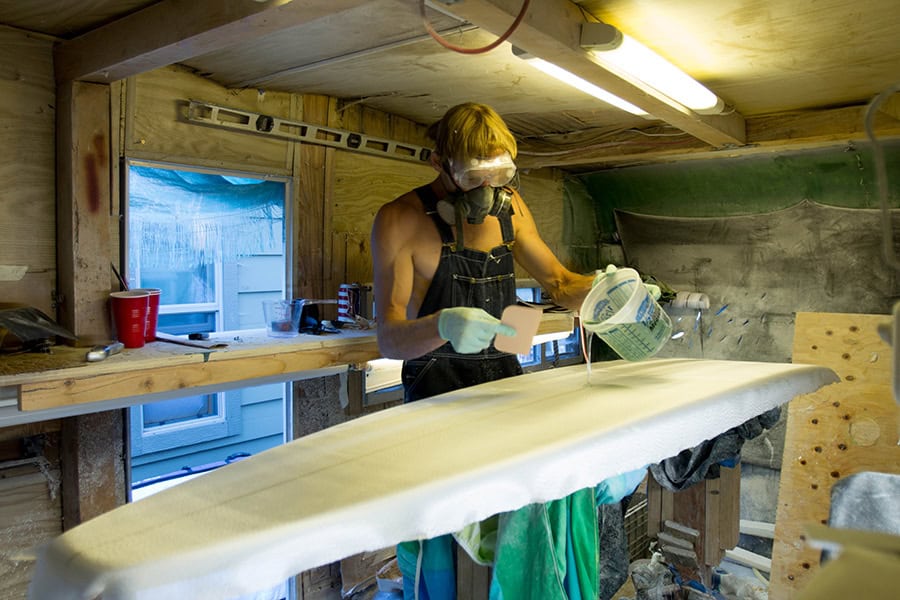
3. Applying fiberglass and resin: Cut fiberglass cloth according to the size of your board and apply it layer by layer onto the shaped foam using epoxy resin or polyester resin. Make sure each layer is fully saturated before adding another one.
4. Sanding and finishing: Once the resin has cured completely (usually overnight), use various grits of sandpaper to smooth out any imperfections on both sides of the board until it feels sleek under your fingertips.
Tips for Shaping and Sanding Your Board
Shaping a surfboard requires precision and attention to detail in order to achieve optimal performance in the water. Here are some tips for shaping:
1. Use proper safety equipment: Wear protective goggles or glasses when shaping foam as small particles can irritate eyes or lungs.
2. Take measurements: Before starting any cuts or shaping, take accurate measurements of the board’s length, width, and thickness. This will help you maintain consistency throughout the process.
3. Start with rough shaping: Begin by removing excess foam using a planer or electric saw. Take your time and make small adjustments to avoid removing too much material at once.
4. Use templates or guides: If you’re new to shaping, using templates or guides can help ensure symmetry and proper proportions in your board’s outline.
When it comes to sanding your board, here are some additional tips:
1. Start with coarse grit sandpaper: Begin sanding with a coarse grit (around 60-80) to remove any rough spots or imperfections left from the shaping process.
2. Progressively move to finer grits: As you work your way through the sanding process, switch to finer grits (120-220) for a smoother finish. This will also help prepare the surface for gloss coating later on.
3. Pay attention to details: Don’t forget about the rails and tail of your board – these areas require extra care when sanding as they can greatly affect performance in the water.
Applying the Finishing Touches to Your Board
Once you’ve shaped and sanded your surfboard, it’s time for some finishing touches that will give it a personal touch:
1. Adding graphics and designs: You can use paint pens or airbrush techniques to add unique designs or artwork onto your board’s surface. Let your creativity flow!
2. Applying a gloss coat: A gloss coat not only enhances the appearance of your surfboard but also provides an extra layer of protection against UV rays and water damage. Follow manufacturer instructions when applying this final layer.
Remember that these finishing touches are optional but can add character and individuality to your surfboard.
How to Choose the Right Wetsuit and Accessories
Surfing is often associated with cold water and chilly weather, so choosing the right wetsuit is essential for comfort and safety. Here are some factors to consider when selecting a wetsuit:
1. Thickness: Wetsuits come in different thicknesses, usually measured in millimeters (mm). Thicker suits provide more insulation but can restrict movement. Thinner suits offer more flexibility but may not be suitable for colder conditions.
2. Style: Wetsuits come in various styles such as full suits, spring suits, or shorties. Full suits cover your entire body and are ideal for colder water temperatures, while spring suits or shorties provide less coverage and are better suited for warmer climates.
3. Fit: A properly fitting wetsuit should be snug but not too tight or restrictive. It’s important to try on different sizes and brands to find the one that fits you best.
In addition to a wetsuit, there are other accessories that can enhance your surfing experience:
1. Surfboard leash: A leash attaches your board to your ankle or calf, preventing it from drifting away if you fall off during a wave.
2. Wax: Applying surf wax onto the deck of your board provides traction between your feet and the board’s surface, allowing for better grip while riding waves.
3. Fins: Fins play a crucial role in controlling the direction and stability of your surfboard. There are various fin setups available depending on personal preference and surfing style.
Learning to Catch the Perfect Wave
Now that you have built your own surfboard and equipped yourself with the necessary gear, it’s time to hit the waves! Here are some tips for catching waves like a pro:
1. Paddling out: Position yourself correctly on your board by lying flat with both hands extended forward on either side of the board’s rails (sides). Use strong paddling strokes with cupped hands to generate speed as you paddle out past the breaking waves.
2. How to read waves: Understanding wave patterns and how they break is crucial for catching the right wave. Look for a peak or a section of the wave that is starting to form and paddle towards it.
3. Techniques for catching and riding waves: As you approach the wave, start paddling harder to match its speed. Once you feel the push of the wave behind you, pop up onto your feet in one fluid motion, keeping your weight centered over your board. Bend your knees slightly and use your arms for balance as you ride down the face of the wave.
Remember that surfing takes practice, patience, and perseverance. Don’t get discouraged if you don’t catch every wave – even experienced surfers miss some!
Safety Tips for Surfing Beginners
While surfing can be an exhilarating sport, it’s important to prioritize safety both in and out of the water:
1. Know your limits: Start with smaller waves that are appropriate for your skill level before attempting larger or more challenging breaks.
2. Avoid common surfing injuries: To minimize injuries while surfing, always be aware of other surfers around you and avoid collisions by practicing proper etiquette (more on this later). Additionally, learn how to fall safely by covering your head with both arms when falling off your board.
3. Surfing etiquette: Respect other surfers in the lineup by following basic rules such as taking turns on waves (first-come-first-served), not dropping in on someone else’s ride, and being mindful of local customs at different breaks.
The Joy of Riding Your Own Board and Surfing Waves

In conclusion, building your own surfboard is a rewarding experience that allows you to create something unique while saving money compared to buying a pre-made board from a store or shaper. By customizing every aspect according to personal preferences, building a surfboard becomes an extension of oneself.
Not only does building your own board provide a sense of accomplishment, but it also opens up a world of possibilities for exploring different types of surfboards and riding styles. Whether you’re a beginner or an experienced surfer, the joy of catching waves on a board that you built yourself is unparalleled.
So, if you’ve ever dreamed of riding the perfect wave and experiencing the thrill of surfing, I encourage you to give it a try. Building your own surfboard is not only an investment in your surfing journey but also an opportunity to connect with nature and embrace the freedom that comes with riding waves. So grab some foam, fiberglass, and tools – let’s get started!
FAQs
What is surfing?
Surfing is a water sport in which a person rides a board on the surface of a breaking wave.
What are the different types of surfboards?
The different types of surfboards include shortboards, longboards, funboards, fish boards, and gun boards.
What materials are used to make surfboards?
Surfboards are typically made from foam, fiberglass, and resin.
How do you choose the right surfboard?
The right surfboard depends on your skill level, height, weight, and the type of waves you will be surfing.
What are the steps to building your own surfboard?
The steps to building your own surfboard include shaping the foam, adding fiberglass and resin, sanding the board, and adding fins and a leash.
What are the benefits of building your own surfboard?
Building your own surfboard allows you to customize the board to your specific needs and preferences, and can be a fun and rewarding experience.
What are some tips for catching the perfect wave?
Some tips for catching the perfect wave include positioning yourself correctly, paddling with power, and timing your pop-up correctly.